Key Takeaways
- The right decoration process depends on part geometry, substrate, artwork, durability requirements, and production volume.
- Curved, recessed, tapered, and highly detailed parts often require different handling and transfer approaches than flat surfaces.
- Surface preparation, ink selection, fixturing, and curing can be as important as the printing machine itself.
- Automation can improve consistency when loading, positioning, inspection, or drying becomes a production bottleneck.
- Testing the actual production part before launch helps uncover adhesion, registration, and wear issues early.
Decorating a finished product is rarely a simple choice between one printing method and another. A logo, control marking, code, graphic, or metallic accent must fit the part’s shape, material, expected use, and manufacturing plan. The process that works well on a flat panel may be a poor match for a small housing with curves, recesses, or raised features.
For manufacturers evaluating equipment for complex parts, pad printers from Diversified Printing Techniques provide single-color, multi-color, integration, and modular system options, along with related tooling, pads, plates, ink controls, and automation support. With national and Midwest sales coverage, Diversified Printing Techniques is a relevant resource for U.S. manufacturers that need repeatable decoration on contoured or difficult-to-position products.
Why Part Shape Should Guide The Process
Part geometry should be reviewed before selecting a decoration method. Flat faces generally provide the broadest range of options because the product can be held steadily and the print head can approach the surface directly. Curved housings, narrow handles, tapered containers, recessed pockets, and uneven molded features create additional challenges.
- Flat surfaces can support screen printing, digital printing, hot stamping, laser marking, and other processes.
- Curved or compound surfaces may require a flexible transfer pad, specialized tooling, or controlled printhead movement.
- Recessed areas can limit access and make accurate artwork placement more difficult.
- Small parts need fixtures that hold each item consistently without damaging cosmetic surfaces.
- Raised ribs, buttons, textures, and mold details can interrupt image transfer or cause uneven contact.
The basic pad printing process transfers an image from an etched plate with a silicone pad, which is why it can be useful when an image must conform to a three-dimensional surface. Even so, pad shape, hardness, image size, and fixture design still need to match the application.
Material And Surface Factors To Check First
Decoration quality depends on the substrate as well as the machine. ABS, polypropylene, polyethylene, glass, metal, rubber, coated parts, and painted surfaces can each require a different combination of cleaning, pretreatment, ink, foil, or laser settings. A part that appears clean may still carry mold-release residue, oil, dust, moisture, or other contaminants that interfere with adhesion.
Surface energy is especially important for many ink- and foil-based processes. Low-surface-energy plastics may need flame, plasma, or corona treatment before decoration. Texture also matters. A rough texture can reduce edge sharpness, while a glossy surface may reveal registration errors more clearly. Qualification should always be performed on the actual production resin, finish, and color rather than on a convenient substitute sample.
Comparing Common Decoration Methods
Each method has a practical role. The best choice comes from comparing the product requirements, not from choosing the most familiar process.
- Pad printing: Well suited to small graphics, irregular contours, recessed features, and curved parts. The print area can be limited, and adhesion depends on compatible ink and surface preparation.
- Screen printing: Often a strong choice for larger flat or gently curved surfaces, bold colors, and opaque graphics. It is less suitable for deep contours or tight spaces. The screen printing method uses a stencil and mesh to place ink on the substrate.
- Digital inkjet: Can support short runs, variable artwork, and detailed multi-color graphics. Successful use depends on ink compatibility, curing, surface condition, and printhead maintenance.
- Laser marking: Useful for permanent identification, serial numbers, traceability marks, and selected logos. Results depend on how the material and any additives respond to the laser.
- Hot stamping: Appropriate for metallic, glossy, or premium decorative accents. It is generally easier to apply to relatively simple surfaces than to deeply contoured products.
- In-mold decoration: Integrates graphics during molding and can provide a highly durable finish. It usually requires greater tooling and process-development investment.
When Pad Printing Makes Practical Sense
Pad printing is often considered when the graphic is relatively small, and the product surface is not flat. Examples include molded controls, cosmetic packaging, appliance components, promotional items, medical-device components, closures, and consumer electronics details. Its flexible pad can transfer an image across curves, concave areas, convex surfaces, and mixed contours that may be difficult for flat-contact methods.
That does not make pad printing the automatic answer for every complex part. Very large artwork, frequent full-color image changes, extremely high volumes, or requirements for molded-in graphics may point to another process. The decision should account for image dimensions, color count, positioning tolerance, cycle-time goals, and the expected exposure to abrasion, chemicals, washing, heat, or sunlight.
How Automation Changes The Cost Equation
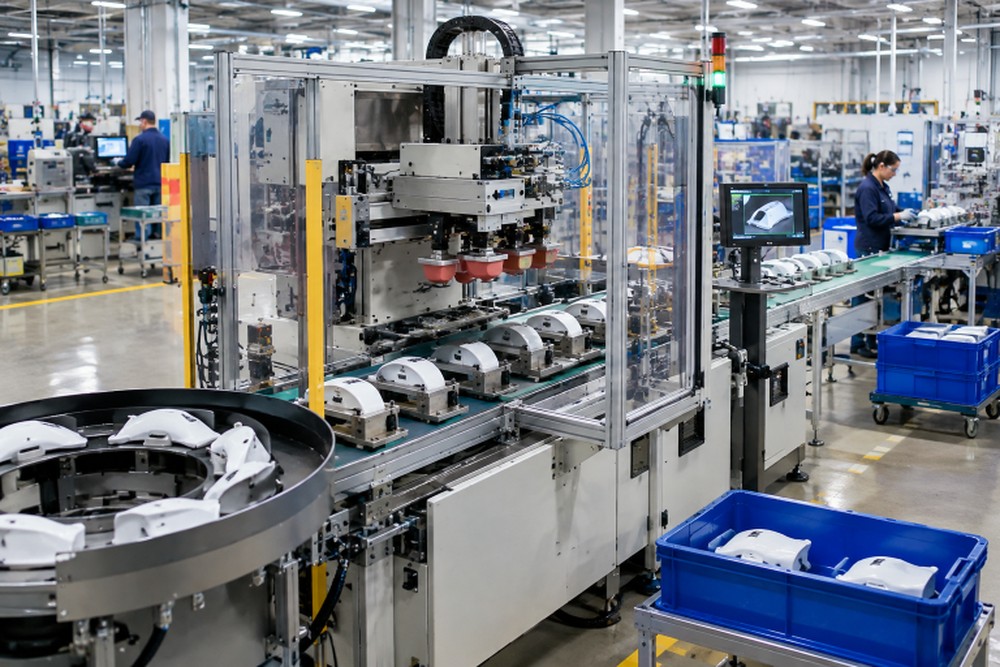
Manual decoration can be practical for prototypes, lower volumes, or jobs with frequent changes. As production grows, however, part loading, unloading, alignment, drying, and inspection can introduce variation and consume labor. Automated cells can use feeders, conveyors, robots, sensors, fixtures, and vision systems to improve repeatability where the business case supports the investment.
- Estimate the number of acceptable parts needed per shift.
- Measure loading, unloading, printing, curing, and inspection time.
- Identify steps that create delays, rework, or inconsistent placement.
- Compare labor requirements with automation costs and expected throughput.
- Consider whether the cell can accommodate future part versions or additional colors.
Print Quality Depends On More Than The Machine
A reliable result comes from the complete process. The machine, fixture, artwork, plate, pad, ink, substrate, drying equipment, and operator procedures all affect the final image. A precise printer cannot compensate for a part that shifts in the fixture or an ink system that has not been matched to the material.
- Use stable fixtures that locate every part in the same orientation.
- Confirm that artwork line widths, text size, and registration marks suit the selected method.
- Match ink, foil, or marking parameters to the substrate and end-use conditions.
- Control ink viscosity, environmental conditions, and working time during production.
- Allow adequate drying or curing before handling, packaging, or testing.
Testing And Quality Checks Before Full Production
A small validation run can prevent expensive surprises after production begins. Test the real part under conditions that reflect its intended use, then document the settings that produced an acceptable result.
- Decorate actual production parts using the intended material and finish.
- Inspect position, color, edge definition, coverage, and fine detail.
- Allow the decoration to dry or cure fully.
- Perform suitable rub, tape, scratch, chemical, wash, or environmental tests.
- Review results after normal handling and packaging steps.
- Record fixture, ink, pad, plate, curing, and machine settings for repeatability.
Questions To Ask Before Selecting A Supplier
- Has the supplier worked with the same material and surface finish?
- Can the supplier evaluate the actual part geometry and artwork?
- What print-position tolerance is realistic for the application?
- How will fixtures be designed, validated, and maintained?
- Which pretreatment, ink, curing, or inspection steps are required?
- Can the process adapt to future colors, artwork changes, or product versions?
Conclusion
The right decoration method supports the entire manufacturing plan, not just the appearance of a sample. By reviewing part shape, material, artwork, durability, volume, handling, and testing requirements early, manufacturers can reduce rework and choose a process that delivers consistent results on the production floor.