Key Takeaways
- A durable coating depends on the condition of the concrete underneath it.
- The slab should be clean, sound, dry enough for the selected system, and properly profiled before coating begins.
- Oil, old sealer, dust, weak concrete, and unrepaired damage can interfere with adhesion.
- Chicago garages and workspaces deserve extra attention after winter, when road salt, slush, and vehicle contaminants may be tracked indoors.
- Product instructions should guide moisture limits, surface profile, application temperatures, and cure times.
Concrete coatings can make a garage, basement, workshop, retail area, or service space easier to clean and more finished in appearance. However, successful epoxy floors Chicago projects begin well before a roller, squeegee, or decorative flakes are brought into the room.
Chicago-area floors deal with real seasonal challenges. Snowmelt, road salt, wet tires, temperature swings, and older concrete slabs can all affect preparation decisions. A coating is not a repair for weak, dirty, or damp concrete. It will only perform as well as the surface it is applied to.
Why Preparation Sets the Stage
A floor can look clean after it has been swept and still have contaminants that prevent a strong bond. Oil can soak into pores, old curing compounds may leave a nearly invisible film, and loose dust can remain after years of wear. If the coating material bonds to residue instead of solid concrete, peeling, bubbling, flaking, or uneven wear may follow.
Preparation also creates a more predictable finish. Repairs, profiling, and detailed cleaning help the primer or base coat contact the slab consistently. That matters whether the goal is a simple, solid-color floor or a multi-layer decorative system.
Step 1: Inspect the Concrete Before Cleaning
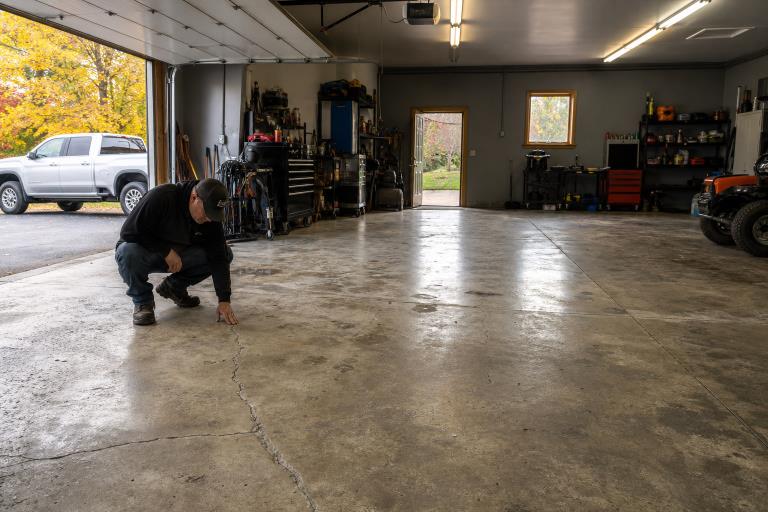
Start with a slow, well-lit inspection. Look across the entire floor, including edges, door openings, expansion joints, corners, and areas beneath parked vehicles or stored equipment.
- Hairline cracks, wide cracks, and joint damage
- Spalling, flaking, pitting, or soft concrete
- Low spots where water tends to collect
- Oil, grease, paint, adhesive, and chemical stains
- Old coatings, waxes, sealers, or curing compounds
- Signs of active water entry or recurring dampness
A small, stable surface crack may be suitable for repair before coating. A crack that continues to move, allows water through, or reflects a larger structural concern needs closer evaluation. Covering an active problem does not make it disappear.
Step 2: Remove Dirt, Oil, and Old Materials
Thorough cleaning means more than sweeping. Depending on the floor, the process may involve degreasing, mechanical scrubbing, rinsing, wet vacuuming, and a full drying period. The goal is to remove materials that sit on the concrete or have worked into its pores.
Common Contaminants to Address
- Motor oil, grease, and tire residue
- Road salt and winter grime
- Paint overspray and old adhesive
- Silicone, wax, and household cleaners
- Loose concrete dust and failed prior coatings
Cleaning products must be removed as directed, too. Degreaser or soap residue can leave its own film on the slab. After rinsing, the surface should be allowed to dry fully before moisture testing, repairs, or coating application.
Step 3: Check for Moisture
Concrete may appear dry on top while moisture vapor continues to move through the slab. This is particularly important in basements, below-grade spaces, older garages, and locations where water has entered during wet weather. The moisture testing methods used for concrete show why a surface-level check alone may not reveal conditions deeper in the slab.
Common options include a plastic-sheet screening test, moisture vapor emission testing, and in-situ relative humidity testing. These methods do not measure the same thing, so the selected coating system and project requirements should determine which test is appropriate. If results exceed the coating manufacturer’s limits, the plan may need more drying time, moisture mitigation, or a different system.
Step 4: Repair Cracks and Surface Damage
Repair damaged areas before final surface preparation whenever possible. Pits, chips, shallow spalls, and stable cracks may require compatible patching or crack-filling materials. Loose or deteriorated concrete should be removed until solid material remains.
Ask practical questions before choosing a repair method: Is the crack stable? Is water involved? Is the surrounding concrete strong? Will the repair material accept the intended coating? Has the repair had enough time to cure? Once cured, repaired areas often need to be ground flush so they do not create visible ridges in the completed floor.
Step 5: Create the Right Surface Profile
Surface profiling gives the coating a textured, clean surface to grip. A hard, glossy, sealed slab may look smooth and tidy, but it can offer too little mechanical bond for many coating systems. The required texture depends on the product being used.
Common Profiling Methods
- Diamond grinding:Useful for controlled preparation, old coating removal, stain reduction, and smoothing repaired areas. Proper dust collection is important.
- Shot blasting:Often suited to larger commercial or industrial spaces where a more aggressive profile is required.
- Acid etching:Sometimes considered for small, clean, unsealed slabs, but it may not remove deep contamination, old sealers, or weak concrete.
Professional preparation plans commonly rely on established approaches to evaluating concrete and preparing surfaces. The concrete repair guidance available through technical publications can help explain why surface condition and material compatibility deserve attention before coatings are installed.
Step 6: Remove Dust Before Coating
Grinding and blasting can leave fine particles in pores, joints, floor drains, and wall edges. If dust remains, the coating may attach to the dust rather than the concrete. Vacuum the entire floor with equipment designed for fine concrete dust, then inspect corners and repaired areas closely.
A simple final check is useful: the slab should have a consistent profile and should not leave obvious powder on a clean glove or cloth. Follow the coating manufacturer’s final cleaning instructions, especially if the system requires a particular primer or solvent-free cleaning process.
Step 7: Review Application Conditions
Temperature, humidity, slab temperature, ventilation, dew point, and condensation risk can all influence application and curing. In Chicago, seasonal weather can make an unheated garage especially challenging during colder months. The material data sheet should be treated as the working schedule, not a general estimate from another project.
Applying a coating outside its recommended conditions can lead to poor flow, cloudy appearance, bubbles, soft areas, or reduced adhesion. It is often better to delay work than to coat a cold or damp slab simply to stay on a preferred timeline.
Choosing a Coating System for the Space
- Home workshops and light foot traffic:Prioritize easy cleaning, appearance, and routine wear resistance.
- Garages:Consider hot tires, impacts, road salt, oil, moisture, and the time needed before vehicles can return.
- Commercial spaces:Review traffic levels, cleaning chemicals, downtime, and future repair needs.
- Wet areas:Plan for drainage, water exposure, and an appropriate slip-resistant finish.
- Sunlit spaces:Consider how sunlight may affect the appearance of the chosen topcoat over time.
Common Preparation Mistakes to Avoid
- Coating over oil, grease, or old sealer.
- Skipping moisture evaluation on a questionable slab.
- Using light etching as a substitute for removing damaged concrete.
- Leaving grinding dust behind after profiling.
- Coating repairs before they have cured as required.
- Ignoring active leaks, water intrusion, or moving cracks.
- Using a generic cure schedule instead of product instructions.
When Professional Help Makes Sense
Professional help may be appropriate for large floors, heavy oil contamination, widespread spalling, failed old coatings, moisture concerns, or projects requiring dust-controlled mechanical preparation. It can also be valuable when downtime matters, such as in busy garages, retail spaces, warehouses, and service areas.
Final Checklist for a Coating-Ready Floor
- The concrete is sound, and damaged areas have been repaired.
- Oil, salt residue, loose dust, and old materials have been removed.
- Moisture conditions meet the selected system’s requirements.
- The surface has the required profile.
- The floor is clean, dry, and free of loose residue.
- Application conditions and cure times have been confirmed.
Conclusion
Long-lasting concrete floor coatings start with disciplined preparation. For Chicago property owners, that means accounting for the slab’s condition, moisture history, winter contaminants, repairs, and application environment. When the concrete is properly inspected, cleaned, repaired, profiled, and dust-free, the finished floor has a stronger foundation for reliable performance.