Key Takeaways
- Plan insulation as part of the whole home, including air leaks, ducts, attic conditions, and moisture control.
- Repair leaks, pest damage, unsafe electrical conditions, and contaminated materials before adding insulation.
- In Atlantis, Florida, humidity management and properly sealed ductwork can be as important as insulation depth.
- Compare written proposals by scope of work, not simply by the lowest price or material type.
For homeowners in Atlantis, Florida, a whole-home insulation upgrade should begin with an assessment instead of a quick decision based on product cost. A qualified Atlantis insulation contractor can help identify whether the home needs attic insulation, air sealing, duct improvements, cleanup, or moisture corrections before new material is installed.
South Florida homes work hard to keep conditioned air indoors through long cooling seasons. When attic heat, humid outdoor air, leaky ceiling openings, or ducts in unconditioned spaces affect the building envelope, one warm bedroom or a high utility bill can have more than one cause.
Why A Whole-Home Plan Works Better in Atlantis, Florida
Insulation is only one layer of home performance. Attics, exterior walls, garage ceilings, crawl spaces, ductwork, exhaust vents, and access hatches all influence comfort. Adding insulation over active leaks or large air gaps may leave the underlying issue unresolved.
For example, an upstairs room may feel warmer because insulation is thin, but it may also have a poorly sealed attic hatch, recessed fixtures, or leaking supply ducts above the ceiling. Finding the major pathways first gives the insulation upgrade a clearer purpose.
In Atlantis’s humid coastal environment, a persistent humidity problem deserves attention before insulation work begins. Condensation, damp insulation, musty odors, and sweating ducts can point to moisture or air-distribution issues that need correction rather than concealment.
Step One: Check The Home’s Current Condition
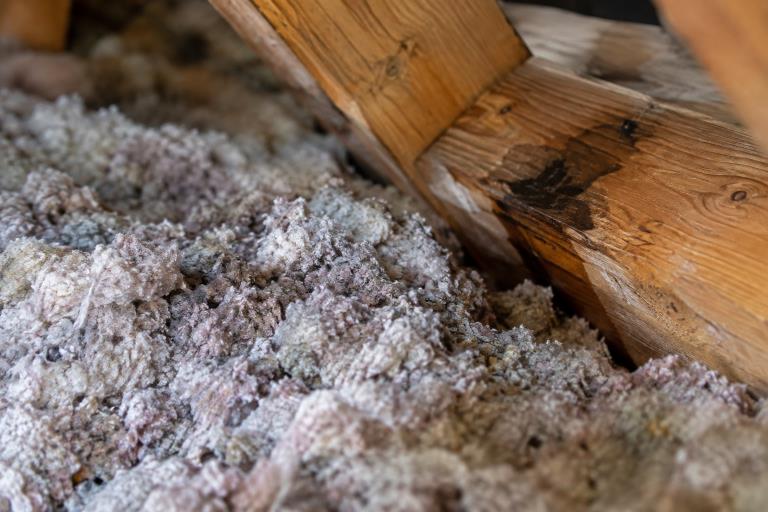
Start with a visual review of accessible attic and crawl-space areas. Look for uneven insulation coverage, compressed batts, stains, wet areas, rodent activity, insect damage, roof leaks, plumbing leaks, exposed wiring, and blocked soffit vents. Check whether bathroom and kitchen fans terminate outdoors rather than releasing moist air into an attic.
Also, note any ducts located outside the conditioned living area. In Atlantis homes, attic ductwork can be exposed to substantial heat, so disconnected joints, damaged insulation, or air leakage can affect comfort and system performance. A professional inspection is sensible when access is limited, walking surfaces are unsafe, old materials are questionable, or contamination is visible.
Step Two: Seal Major Air Leaks Before Insulating
Insulation slows heat transfer, while air sealing limits uncontrolled air movement through gaps. These jobs often belong together, but they are not the same task. Before adding attic insulation, homeowners should identify openings around plumbing pipes, wiring, top plates, dropped soffits, duct boots, vent pipes, and the attic hatch.
Use safe attic air-sealing practices to guide the work around common ceiling penetrations. Chimneys, flues, recessed fixtures, and other heat-producing components require appropriate clearances and materials, so they should not be treated like ordinary gaps.
Step Three: Address Moisture And Ventilation
New insulation should never cover an active roof leak, wet decking, moldy surface, or contaminated debris. Repair water entry first, correct drainage or crawl-space dampness where applicable, and verify that exhaust fans vent outdoors. In a traditionally vented attic, baffles may be used near eaves to preserve the intended airflow path between the soffit and upper roof ventilation.
Not every attic uses the same design. A vented attic and a sealed attic have different requirements for insulation location, air control, and ventilation. The correct approach depends on the roof assembly, HVAC layout, existing conditions, and applicable local building requirements.
Step Four: Compare Insulation Materials
- Fiberglass batts or blown-in fiberglass: Often suitable for accessible areas when coverage is even, and gaps are avoided.
- Cellulose: Can fill irregular attic spaces and wall cavities, but installation depth and density must be controlled.
- Open-cell spray foam: Expands to fill many gaps and may be appropriate in selected assemblies.
- Closed-cell spray foam: Provides high insulating value in limited space, but requires careful planning for moisture, fire protection, and installation conditions.
- Rigid foam board: Can provide continuous insulation in certain roof, wall, foundation, or garage applications.
No material is automatically best for every Atlantis home. Available space, moisture exposure, access, budget, desired air barrier, and the surrounding assembly all matter more than a product label alone.
Step Five: Choose Upgrade Areas In A Practical Order
- Correct active leaks, pest issues, contamination, and safety concerns.
- Seal large gaps between conditioned rooms and the attic, garage, or crawl space.
- Improve thin, damaged, or uneven attic insulation.
- Inspect and repair ducts outside the conditioned envelope.
- Evaluate floors above garages or other unconditioned areas.
- Consider wall insulation during remodeling, siding work, or drywall replacement.
- Review windows and doors after larger air and insulation deficiencies have been addressed.
Build A Realistic Budget for Atlantis Insulation Work
Project pricing can vary with attic size, access difficulty, insulation type, target R-value, old-insulation removal, air sealing, duct repairs, ventilation work, electrical corrections, cleanup, disposal, permits, and inspections. Request an itemized proposal that separates preparation, removal, repairs, sealing, insulation installation, cleanup, and warranty terms.
Questions To Ask Before Hiring
- What conditions did the inspection identify, and which need correction first?
- Why is the recommended material appropriate for this part of the home?
- What insulation level and coverage will be installed?
- How will vents, ducts, exhaust outlets, and heat-producing fixtures be protected?
- Will damaged or contaminated insulation be removed and disposed of?
- How will the completed work be documented and checked?
How To Check Finished Work
After installation, look for consistent insulation depth, coverage at edges, and the absence of bare or compressed areas. Confirm that attic hatches are insulated and sealed, ventilation channels remain open where required, and ducts or vents were not damaged. Homeowners can also request photos, depth markers, and a final walkthrough. For a clearer understanding of why large openings matter, review the areas where attic penetrations allow air movement before judging an upgrade by insulation depth alone.
Conclusion
A successful whole-home insulation project in Atlantis, Florida, begins with diagnosis, not just installation. Address moisture and safety concerns, seal significant air leaks, protect the roof assembly and ventilation strategy, then select materials that fit the home. A detailed scope makes contractor comparisons easier and helps turn insulation into a lasting comfort and efficiency improvement.